

Are you a knitting enthusiast who has mastered scarves and blankets but has yet to venture into the realm of adorable toys? Well, I've got just the project for you! Imagine a cute, small bear that not only serves as a charming addition to your collection but is also incredibly easy to make. This delightful creation is the perfect stepping stone before diving into more complex projects. So, why not take a break from your routine and knit your way to happiness this weekend with this bear toy knitting pattern? Let's explore the joy of crafting together!
Skill Level
Intermediate
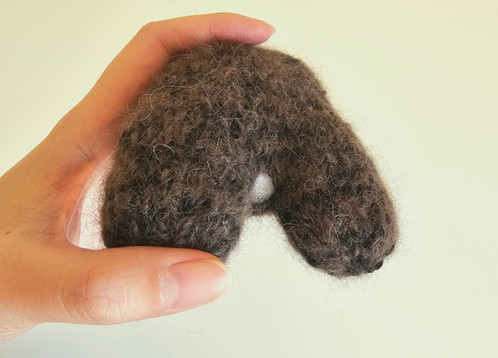
Finished Size
5.5 in / 14 cm (with arms up)
Needles
4 double-pointed needles 6” (15 cm)
Needle Size
US 3 (3.25 mm), US 1 (2.5 mm)
Yarn
(Sport) 100% Wool (50 g/ 175 m/ 191 yds) For body, arm and nose
(Lace) 35% Alpaca, 35% Mohair, 30% Polyamide (25 g/ 150 m/ 164 yds) For body and arm
(Lace) 75% Mohair, 25%Silk (25 g/ 210 m/ 230 yds) For nose only
* This bear is knitted with two strands of yarn. However, you can knit with one strand of yarn. Adjust needle size to obtain the correct gauge if necessary.
Yarn Amounts
Color 1:
approx. 15g (100% Wool)
approx. 6g (35% Alpaca, 35% Mohair, 30% Polyamide)
* I mixed black and brown for this bear. I marked them as color 1 here.
Color 2 (nose) :
approx. 1g (100%Wool)
approx. 1g (75% Mohair, 25%Silk)
* I used my leftover lace yarn to match the white color of the nose. However, you can use the same lace yarn (matching color) as the body, or simply knit with one strand of yarn.
Gauge (Body)
25 sts and 33 rnds = 4 x 4 in / 10 x 10 cm
Instruction
This bear is knitted from head to toe in a round, stuffing in the middle. The arms and the nose are knitted separately and sewn on the body. The face, ears, tail, and fingers are decorated with crochet and embroidery.
German Short Row (Double stitch)
To make the elbow on the arms, the “German short rows” technique is used here. It’s a common technique used to make sock heels or any shaping. If you never try this technique, you can knit the arms straight. However, I strongly recommend you to learn it. It’s easy to learn, which makes your project much more interesting.
Abbreviations
CO cast on
rnd(s) round(s)
st(s) stitch(es)
RS right side
WS wrong side
k knit
p purl
M1 make 1 stitch
k2tog knit 2 stitches together
kfb knit front and back (increase 1 stitch)
DS double stitch
Body
(Color 1) Circular cast on 6 sts on 3 needles (always use a working needle to knit)
Rnd 1: knit 1 rnd
Rnd 2: kfb, repeat (12 sts)
Rnd 3: knit 1 rnd
Rnd 4: k2, m1, repeat * (18 sts)
Rnd 5: knit 1 rnd
Rnd 6: k3, m1, repeat * (24 sts)
Rnd 7: knit 1 rnd
Rnd 8: k4, m1, repeat * (30 sts)
Rnd 9: knit 1 rnd
Rnd 10: k5, m1, repeat * (36 sts)
Rnd 11: knit 1 rnd
Rnd 12: k6, m1, repeat * (42 sts)
Rnd 13: knit 1 rnd
Rnd 14: k7, m1, repeat * (48 sts)
Knit until the height reaches 9 cm/ 3.5 in (measured from the top of the head). Do not cut the yarn.

Keep the first 12 sts (right leg) on the needle. Set aside the next 24 sts (left leg). Keep the last 12 sts (right leg) on the needle.

Continue knitting the legs in a round. (Starting from the side of the body)
Rnd 1-8: knit 8 rnds (24 sts)
Rnd 9: k2, k2tog, repeat * (18 sts)
Rnd 10: knit 1 rnd
Rnd 11: k1, k2tog, repeat * (12 sts)
Rnd 12: knit 1 rnd, gather bind off.
Stuff the body now. Then, repeat the same process for another leg. Stuff more before the bind-off.
After finishing, you will see a hole between the legs. Use the same yarn to sew them together.


Nose
(Color 2) Cast on 18 sts on 3 needles (US1 / 2.5mm)
Rnd 1: knit 1 rnd
Rnd 2: k1, k2tog, repeat * (12 sts)
Rnd 3-4: knit 2 ends, gather bind off
Stuff and sew on the face.
Arms
(Color 1) Circular cast on 12 sts on 3 needles
Rnd 1: knit 1 rnd
Rnd 2: k2, m1, repeat * (18 sts)
Rnd 3-9: knit 7 rnds
Now, we knit back and forth to create an elbow.
Short row 10 (RS): k16, turn
Short row 11 (WS): DS, p14, turn
Short row 12: DS, k12, turn
Short row 13: DS, p10, turn
Short row 14: DS, p8, turn
Short row 15: DS, p6, turn
Short row 16: DS, k4, turn
Short row 17: DS, p2, turn
Rnd 18 (RS): DS, knit 1 rnd, spread the stitches evenly on 3 needles
Rnd 19 : k4, k2tog, repeat* (15 sts)
Rnd 20-23: knit 4 rnds
Rnd 24: k3, k2tog, repeat* (12 sts)
Rnd 25-28: knit 4 rnds, Stuff and gather bind off.
Sew them on the body. ( I sew them with wool yarn which connects two arms directly in the body. So, the arms are movable.)
EARS
Crochet hook (D/ 3.5mm), 100% Wool (Black)
Make 6 chain stitches on both sides of the head. Bind off.
Tight two ends together to secure. Weave in loose ends.

FINISHING
For the shape of the head, thread 100% Wool yarn on a needle. Go through the neck between stitches, and back to the starting point. (ensure all the stitches on the outside are not too long, otherwise, you can see the yarn outside.) Then, tighten it to get the head shape. Make a few knots to secure. Weave in loose ends.

For the face and tail, I embroider them with the same yarn as the body.


For the fingers, I made some one-thread fringes with 100% Wool yarn (Black). You can use a crochet hook or thread needle to do it.

Do you like my knitting pattern? Share your work with me!
Don't forget to follow my Instagram to see my latest work.

